Welcome to the future of trading! If you’re looking to enhance your trading strategy through automation, you’ve landed in the right place. In this guide, we’ll explore how to generate alerts for futures trading using Interactive Brokers (IB) and TradingView. Automation can make a significant difference in your trading efficiency, and we’re here to walk you through the entire process.
Connecting Interactive Brokers with TradingView
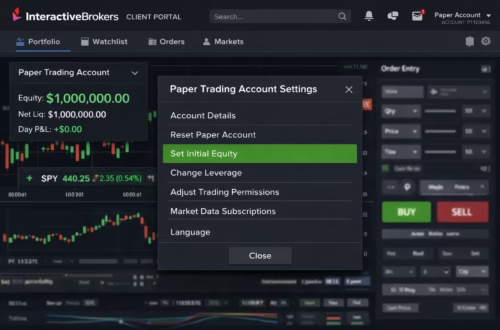
Before we dive into generating alerts, let’s ensure that your Interactive Brokers application is properly connected to TradingView. This connection is crucial for executing automated trades based on the alerts you will set up.
To check the connection status, simply look for the indication that your IB application is connected. Once confirmed, you’re ready to move on to generating alerts.
Generating Alerts for Futures Trading
Generating alerts within TradingView is straightforward. Head over to the “Generate Alert” section. Make sure to select IB as your connected broker. Here’s how to proceed:
- Select the alert type: You have two options here—Indicator or Strategy.
- For a futures trade, choose the “Strategy” option and select “Futures” as your instrument type.
- Click on “Generate Alert” to create your alert.
Understanding Alert Types
When creating alerts, you need to decide whether you are setting up an alert for a buy or sell trade. Here’s a breakdown:
- Buy Alert: If you generate a buy alert while having an open sell position, the system will close the sell position and place the buy order.
- Sell Alert: Conversely, if there’s an open buy position, it will be closed before placing the sell order.
Setting Up Order Types
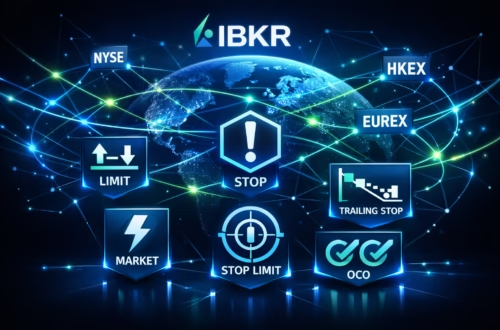
After choosing your alert type, you’ll need to specify the order type. There are two primary options:
- Market Order: Executes at the current market price.
- Limit Order: Sets a specific price at which you want to buy or sell.

Photo by Arthur Mazi on Unsplash
Limit Orders Explained
When using limit orders, you can specify a time frame for how long you want to wait before the order converts to a market order. For instance, if you set a time limit of 10 seconds and your limit order isn’t filled, it will automatically convert to a market order. This feature significantly increases your chances of getting your order filled.
Setting Stop Loss and Take Profit
Another critical aspect of automated trading is managing risk through stop loss and take profit settings. You can choose various types of stop losses:
- Dollar Amount: Specify a dollar amount that will be added or subtracted from your entry price.
- Percentage: Set a percentage of your entry price for stop loss.

Calculating Take Profit and Stop Loss
For example, if your entry price is $100 and you set a stop loss of $5, your stop loss will be at $95. If you’re trading a lot size of 20, your total loss would be $100. It’s essential to understand these calculations to ensure you’re managing your risk effectively.
Creating Alerts in TradingView
Once you’ve set your parameters, click on “Generate Alert.” This will provide you with an alert code. Copy this code and head over to TradingView.
In TradingView, go to the alert section and paste the alert code into the appropriate box. Ensure you enter the webhook URL from PickMyTrade. This is crucial for the system to place your order once the alert triggers.

Photo by Ryoji Iwata on Unsplash
Executing Orders
Once your alert is set, TradingView will trigger it based on your conditions. For instance, if your alert is at 58,987.75 and it’s not filled in 10 seconds, it will convert to a market order. This ensures that you don’t miss out on trading opportunities.
Placing Sell Orders
To place a sell order, select the order type as Market. Specify the quantity you wish to trade and set your stop loss. You can choose the stop loss type as price or ticks, depending on your preference. After clicking “Generate Alert,” copy and paste it into TradingView as before.

Photo by Johann Walter Bantz on Unsplash
Final Checks and Confirmation
Once the order is placed, always check the alert section to confirm if the alert has triggered correctly. You should see your orders, stop loss, and take profit values reflected accurately in your trading interface.
Conclusion: Embrace Automated Trading
Automation in trading, especially with tools like Interactive Brokers and TradingView, can significantly enhance your trading efficiency. By setting alerts and managing your trades effectively, you can take your trading game to the next level.
Ready to optimize your investments? Explore PickMyTrade’s automated trading solutions for expert strategies and real-time insights!

Photo by Muhammad Asyfaul on Unsplash
PickMyTrade
PickMyTrade specializes in automating trading bots, enabling seamless strategy execution for futures from platforms like TradingView, across well-known brokers such as Tradovate.